Installing the Agent
As a SaaS product, CAST Highlight doesn’t require any web server to run on your environment to display your portfolio results. However, its goals are also to be non-intrusive and to ensure that your confidential information never leaves your company’s premises.
To that end, we will be performing the actual analysis of the applications’ source code locally and we’ll upload the results of the scan to the SaaS portal, which only contains meta-data.
Requirements
This step requires access to a windows-based OS.
The CAST Highlight Agent can actually run on any OS with Java but will be limited to command-line only mode unless we use the Windows-based GUI. For the simplicity of this workshop, we’ll stick to that version but rest assured that the command-line can easily be run on Linux, MacOS or a Docker container and be seamlessly integrated into your CI/CD pipeline.
If your machine is not Windows-based, we can quickly spin one up on EC2. A complete tutorial on how to do this is available here. It basically boils down to:
- Launching a fresh instance (we recommend using the Microsoft Windows Server 2019 Base AMI of type t3.large)
- Creating a private key (.pem) file
- Decrypting the administrator password
- RDPing to the machine and installing your favourite browser.
Then you should copy the applications to scan onto the EC2 instance, and from there log in to your freshly minted account at https://demo.casthighlight.com where you’ll proceed to the next step.
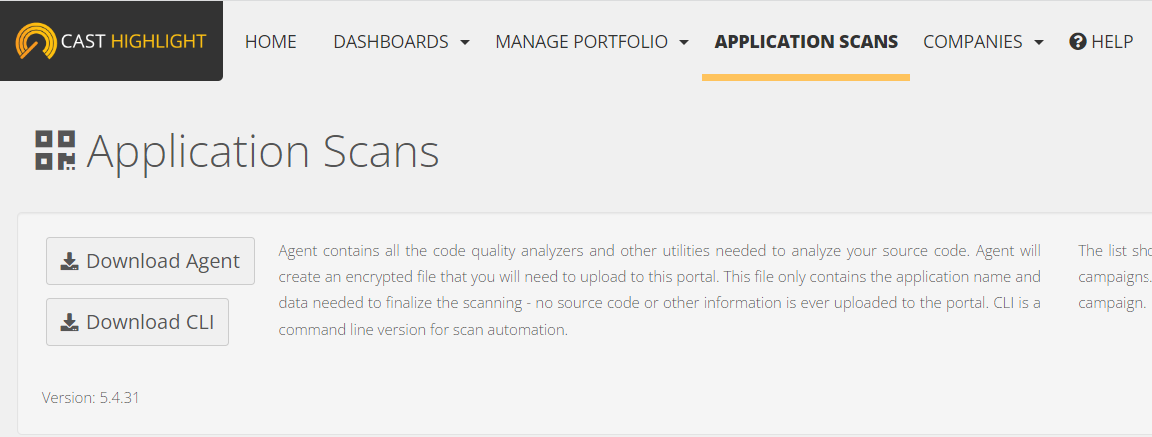
Downloading the Agent
From the Application Scans page you can simply click on the Download Agent button and save the agent on your (Windows/EC2) machine.
Installation process
On your Windows/EC2 machine, the file CastHighlightSetup.exe can be executed and will enable you to choose a Language (we’ll go with English here) for the setup wizard. You can
- Click on Next
- Read the agreement and select the “I accept the agreement” option
- Select an installation folder (as you can see, the agent doesn’t take much space)
- Select a Start Menu folder
- Choose whether or not to create Desktop and Quick Launch icons
- And finally monitor the installation’s progress (it shouldn’t take more than a couple minutes)
… and you’re set.

Onto the actual scanning of code
Leave the “Launch CAST Highlight Agent” option checked and click on Finish…